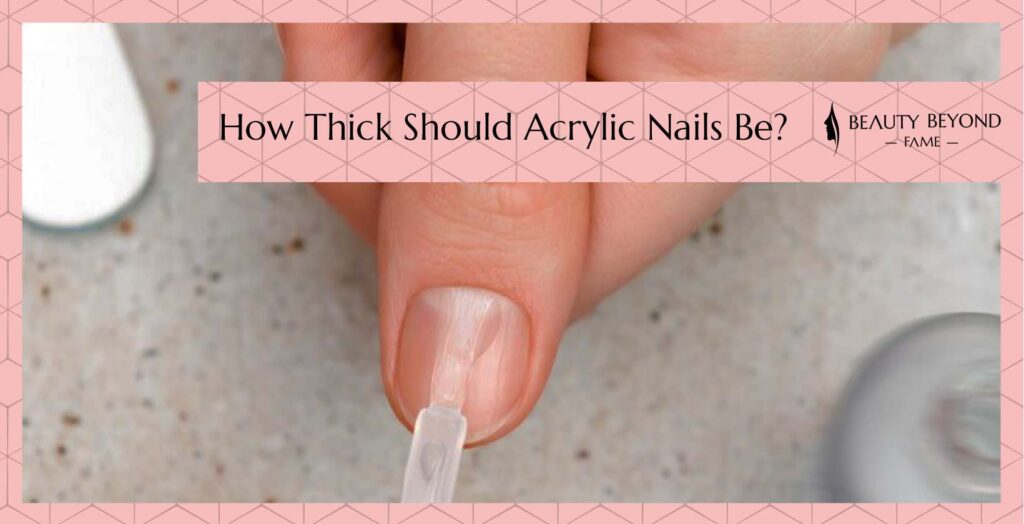
Navigating the world of acrylic nails can often lead to a fascinating question: just how thick should these enhancements be?
The optimal thickness for acrylic nails is approximately 3mm (0.118 inches), akin to a credit card’s thickness. This ensures a balance between durability and aesthetic appeal, with the apex being the thickest part and the cuticle area finely tapered for seamless integration with natural nails
But there’s much to consider regarding the ideal thickness of acrylic nails. Beyond the basic measurements, it’s crucial to delve into the details to comprehend why certain thicknesses are preferred for different styles and durability requirements. Let’s explore the various aspects that influence the thickness of acrylic nails, ensuring both beauty and practicality.
Ideal Thickness for Acrylic Nails
As a nail expert, I’ve seen a variety of acrylic nail styles, but the key to a perfect set lies in the thickness. Acrylic nails should not just mimic the natural look but also ensure comfort and durability. Here’s what you need to know:
- Optimal Thickness Range: Typically, the ideal thickness for acrylic nails is between 0.03 inches (0.76 mm) and 0.05 inches (1.27 mm). This range provides a balance between strength and a natural appearance.
- Apex Importance: The apex, or the highest point of the nail, should be slightly thicker. This area bears the brunt of daily activities, so a bit of extra thickness here prevents breakage.
- Edge and Free Edge: The edges of the acrylic nails, especially the free edge, should be thinner. This ensures a more natural transition from the acrylic to your natural nail.
- Avoiding Discomfort and Pain: Nails that are too thick can cause discomfort or even pain. It’s crucial to tell your technician if you experience any discomfort during application.
- Thickness for Durability: A slightly thicker nail can be more durable. However, too much thickness can lead to unnatural-looking nails and potential damage.
Factors Influencing Acrylic Nail Thickness
| Factor | Impact on Thickness |
|---|---|
| Nail Shape | Certain shapes may require varying thicknesses for structural integrity. |
| Natural Nail Condition | Thinner natural nails might need slightly thicker acrylics for strength. |
| Personal Preference | Some prefer a thicker look for aesthetic reasons, though it should be within a reasonable range. |
Tips for Perfect Acrylic Nail Thickness
- Communicate with Your Technician: As a nail expert, I always recommend discussing your preferences and concerns with your technician. They can adjust the thickness to suit your needs.
- Regular Maintenance: Regular filing and touch-ups can help maintain the ideal thickness and prevent the acrylics from becoming too thick or uneven.
- Quality of Acrylic Material: High-quality acrylic materials can achieve strength without excessive thickness. This results in a more natural and comfortable nail enhancement.
- Avoid Over-Filing: Over-filing can thin out the acrylic too much, leading to breakage. It’s important to find a balance.
Acrylic Nail Durability and Maintenance
As a seasoned nail expert, I’ve learned that the durability of acrylic nails is significantly influenced by their thickness. Here’s a breakdown of how to ensure your acrylic nails last longer while maintaining their beauty:
- Thickness and Durability:
- Ideal Thickness: Acrylic nails should be neither too thick nor too thin. An optimal thickness ranges from 0.03 to 0.05 inches.
- Impact on Durability: Properly thickened acrylic nails are less prone to breaking and can withstand daily wear and tear better.
- Maintenance Tips for Acrylic Nails:
- Regular Filing: Keep your nails in shape and prevent lifting by filing them gently every few weeks.
- Moisturize Your Cuticles: Use cuticle oil daily to keep the skin around your nails healthy and prevent lifting of the acrylics.
- Avoid Harsh Chemicals: When cleaning or washing dishes, wear gloves to protect your acrylic nails from harsh chemicals.
- Activities to Avoid:
- Heavy Lifting: Avoid activities that put excessive pressure on your nails.
- Biting or Picking: These habits can cause damage to both your natural nails and the acrylics.
Tips for Acrylic Nail Care
| Do’s | Don’ts |
|---|---|
| Use cuticle oil regularly | Bite or pick at your nails |
| Wear gloves when using chemicals | Use your nails as tools |
| Get regular touch-ups | Skip maintenance appointments |
Enhancing Acrylic Nail Strength
- Quality of Acrylic: Opt for high-quality acrylic products. They offer better adhesion and are less likely to chip or break.
- Professional Application: Always have your acrylic nails applied by a qualified technician. They know how to balance thickness for both aesthetics and durability.
Aesthetic and Health Considerations in Acrylic Nails
As a nail expert, I’ve seen how crucial it is to find the perfect balance in the thickness of acrylic nails. You want that chic look without compromising the health of your natural nails. Let’s dive into understanding the ideal thickness for both style and comfort.
Ideal Thickness for Acrylic Nails
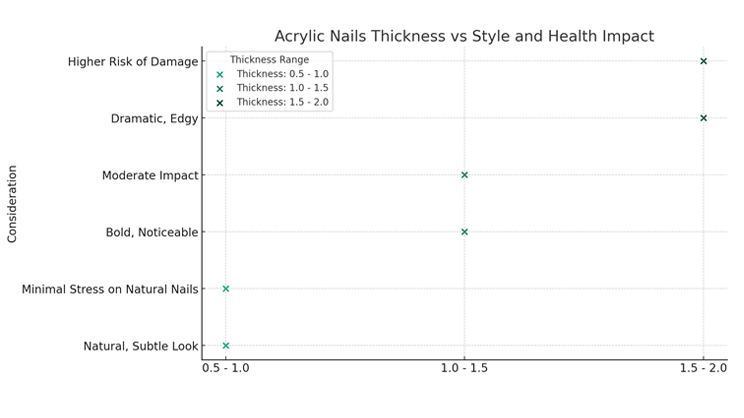
| Thickness (mm) | Style Consideration | Health Impact |
|---|---|---|
| 0.5 – 1.0 | Natural, Subtle Look | Minimal Stress on Natural Nails |
| 1.0 – 1.5 | Bold, Noticeable | Moderate Impact |
| 1.5 – 2.0 | Dramatic, Edgy | Higher Risk of Damage |
The Role of Nail Technicians in Ensuring Nail Health
You rely on your nail technician’s expertise to ensure your acrylics are not just stunning but also safe. A skilled technician will assess the health of your natural nails and recommend the appropriate thickness. They’ll consider factors like your nail’s natural strength and your daily activities.
Recognizing Signs of Discomfort and Taking Action
Being aware of how your nails feel is key. If you experience discomfort or pain, it’s a sign that the acrylics might be too thick or improperly applied. Don’t hesitate to consult your technician. They can adjust the thickness or suggest thinner acrylics to alleviate pressure.
Comparing Acrylics with Gel Nails: A Health Perspective
When deciding between acrylic and gel nails, consider their impact on your natural nails. Gel nails, often thinner and more flexible, might be a gentler option if you’re concerned about nail health.
| Feature | Acrylic Nails | Gel Nails |
|---|---|---|
| Thickness | Generally thicker | Thinner and lighter |
| Flexibility | Rigid | More flexible |
| Natural Look | Less natural | More natural |
| Health Impact | Can be more taxing | Gentler on nails |
Tips for Maintaining Healthy Nails with Acrylics
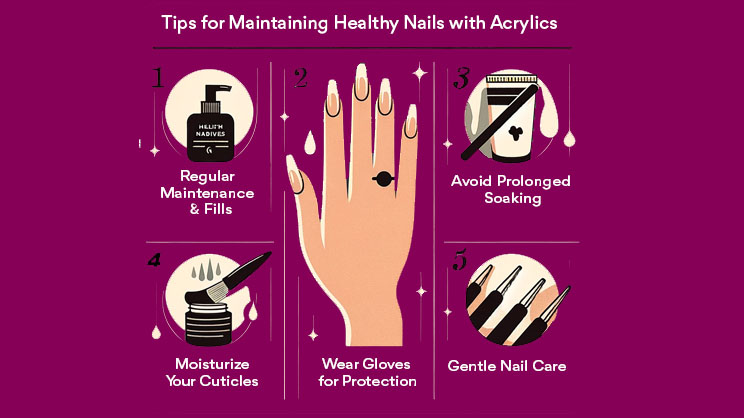
- Regular Maintenance: Regular fills and proper care prevent lifting and breakage.
- Hydration is Key: Keep your natural nails and cuticles moisturized.
- Professional Removal: Always have acrylics removed professionally to avoid damage.
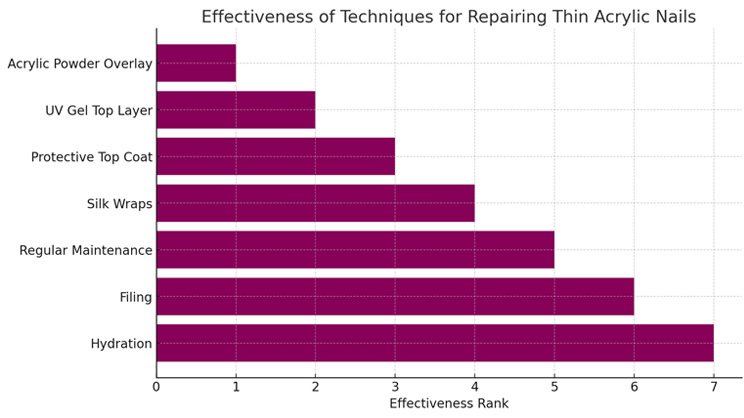
Repair and Care for Thin Acrylic Nails
Being a nail expert, I understand the challenges you face with thin acrylic nails. Repairing and maintaining them requires a blend of skill and the right techniques. Here’s a guide to ensure your thin acrylic nails stay in pristine condition.
Repair Techniques for Thin Acrylic Nails
| Technique | Description |
|---|---|
| Filing | Gently file the nails to even out any irregularities. |
| Acrylic Powder Overlay | Apply a layer of acrylic powder to reinforce thin nails. |
| Regular Maintenance | Regular filling and shaping to prevent further thinning. |
Filing Techniques for Thin Acrylic Nails
Filing is crucial for maintaining the integrity of thin acrylic nails. Use a fine-grit file to gently shape the nail without causing additional thinning. The key is to move in one direction and avoid aggressive back-and-forth motions, which can weaken the nail structure.
Effective Filing Techniques
- Gentle Strokes: Use light, one-directional strokes.
- Fine-Grit File: Choose a file that’s gentle on thin acrylics.
- Regular Shaping: Regularly shape nails to prevent splits or cracks.
Using Acrylic Powder for Repairs
Acrylic powder can be a lifesaver for thin acrylic nails. It adds an extra layer of strength without significant bulk. Mix the powder with a bonding agent and apply it to the nail, focusing on areas that need reinforcement. Allow it to dry and then gently file to shape.
Applying Acrylic Powder
- Target Weak Spots: Apply powder to areas prone to breakage.
- Even Application: Ensure a smooth, even layer for optimal strength.
- Drying Time: Allow sufficient time for the powder to set before filing.
Regular Maintenance for Longevity
Regular maintenance is key to preventing thin acrylic nails from becoming weaker. Schedule regular appointments with your nail technician to fill in any gaps and address any lifting or breakage. At home, keep nails hydrated with cuticle oil and avoid harsh chemicals.
Maintenance Tips
- Regular Filling: Fill in gaps to maintain nail strength.
- Hydration: Use cuticle oil to keep nails and cuticles hydrated.
- Gentle Care: Avoid exposure to harsh chemicals and detergents.
Exploring the World of Acrylic Nail Styles
As a nail expert, I’ve seen firsthand how the right acrylic nail style can transform your look. Acrylic nails offer a canvas for creativity, but choosing the perfect style goes beyond mere aesthetics. It’s about finding a style that resonates with your personal taste and lifestyle. Let’s dive into the diverse world of acrylic nail styles.
Popular Acrylic Nail Styles
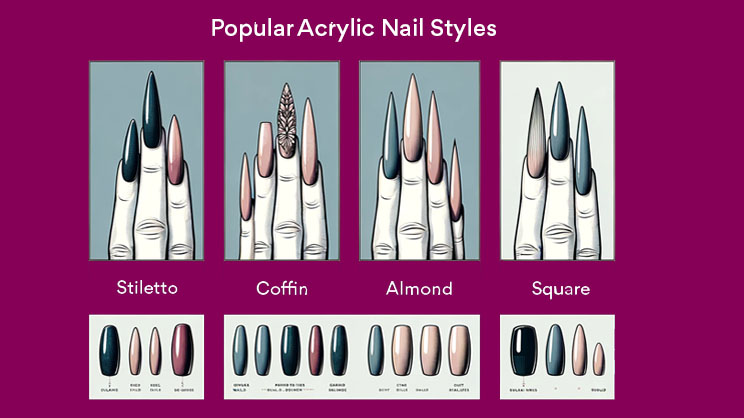
| Style Name | Description | Lifestyle Suitability |
|---|---|---|
| Stiletto | Long and pointed, ideal for a bold statement. | Best for those not involved in heavy manual work. |
| Coffin | Flat-topped with tapered sides, a blend of edge and sophistication. | Versatile, suits most lifestyles. |
| Almond | Oval with a tapered point, elegant and timeless. | Great for everyday elegance. |
| Square | Classic straight edges, perfect for a clean, sharp look. | Ideal for those who prefer a traditional style. |
The Impact of Thickness in Acrylic Nails
You might wonder how thickness plays a role in acrylic nails. Thick acrylic nails are robust and less prone to breakage, but they can feel heavier. On the other hand, thinner acrylic nails offer a more natural feel but require careful handling to avoid breakage. Your choice should align with your daily activities and comfort preferences.
Choosing the Right Thickness
- Thick Acrylic Nails: Offer durability, ideal for those less concerned about natural feel.
- Thin Acrylic Nails: More natural, but require gentle care.
- Lifestyle Consideration: Your daily routine should guide your thickness choice.
The Role of Nail Shape in Personal Expression
The shape of your acrylic nails can tell a story about your personality. From the daring stiletto to the understated elegance of the almond shape, each style has its unique flair. You should choose a shape that not only looks great but feels right for you.
Selecting the Perfect Shape
- Stiletto: Bold and daring, for those who love to stand out.
- Coffin: A mix of edgy and chic, versatile for various occasions.
- Almond: Classic and sophisticated, for a subtle statement.
- Square: Timeless and straightforward, for a no-fuss elegance.
Acrylic Nail Styles and Your Lifestyle
Your lifestyle is a crucial factor in selecting acrylic nail styles. If you’re hands-on with your job or hobbies, opting for shorter, thicker acrylic nails might be practical. For those with a more relaxed lifestyle or who enjoy showcasing their style, longer and more intricate designs can be a perfect choice.
Lifestyle and Acrylic Nail Style Compatibility
| Lifestyle Type | Recommended Style | Reason |
|---|---|---|
| Active | Short, Square | Durability and ease of maintenance. |
| Professional | Medium, Almond | Elegant yet functional. |
| Creative | Long, Stiletto | Allows for artistic expression. |
| Casual | Varied Lengths, Coffin | Versatile for everyday wear. |
Conclusion
I hope this guide has shed light on the intricacies of acrylic nail thickness.
Now, I’m eager to hear your thoughts:
Which aspect of acrylic nail thickness are you planning to focus on? Will you be measuring for that perfect 3mm thickness, or perhaps paying closer attention to the apex and cuticle areas?
Maybe you’re considering how your lifestyle influences your nail thickness choice.
Whatever it is, I’m curious to know. Share your plans or questions in the comments below!

