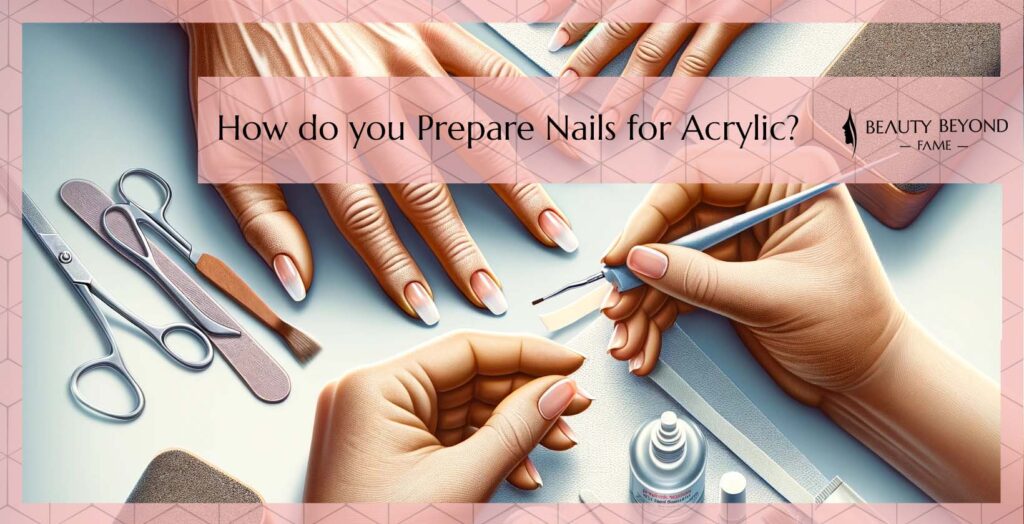
Embarking on the journey of acrylic nail application begins with a crucial step – nail preparation. This foundational process is not just a routine; it’s an art that sets the stage for a stunning and enduring acrylic manicure.
Drawing on the expertise from renowned sources like Hooked On Nails and Naio Nails, and supplemented by additional research and my own experience as a nail expert, this guide is crafted to provide you with an in-depth understanding of preparing your nails for acrylics.
It’s an essential practice that ensures your nails not only look fabulous but also maintain their health and integrity throughout the wear of your acrylics.
Let’s delve into the details of how to prepare your nails for a flawless acrylic application.
Importance of Nail Preparation for Acrylic Application
Proper nail preparation is essential for several reasons. It ensures that the acrylic adheres well to your natural nails, reducing the chances of lifting or breakage. This step also helps in preventing nail infections by removing any potential breeding grounds for bacteria. A well-prepared nail surface provides a smooth canvas, essential for achieving flawless acrylic application.
Overview of Necessary Tools and Materials
Preparing your nails for acrylic application requires specific tools and materials. These include:
- Nail Clippers: To trim the nails to the desired length.
- Nail File: For shaping the nails and smoothing the edges.
- Buffer Block: To create a rough surface for better adhesion of the acrylic.
- Cuticle Remover: For softening and pushing back the cuticles.
- Nail Dehydrator: To remove oils and moisture from the nail surface.
- Nail Primer: Essential for enhancing the bonding between the natural nail and the acrylic.
- Disinfectant: To sanitize your nails and prevent infections.
Incorporating these tools and materials into your nail preparation routine ensures a strong foundation for your acrylic nails.
For more insights on acrylic Nail care, explore our article on UV Lamp Duration to Dry Acrylic Nails. This guide provides valuable information on the drying process, a crucial step following the application of acrylic nails.
Cuticle Care
As a nail expert, let me guide you through a dry manicure, a vital prep step for acrylics:
- Sanitizing: Clean your hands with a sanitizer. Opt for products with nourishing ingredients to avoid drying out the skin.
- Shaping: Use a nail file to shape your nails. Remember, the shape of your natural nails influences the final look of your acrylics.
- Buffing: Gently buff the surface of your nails with a buffer block. This creates a suitable surface for the acrylic to adhere to.
- Cuticle Pushing: With a cuticle pusher, gently push back the cuticles. Be careful not to apply too much pressure to avoid damage.
- Cleaning Nails: Use a brush or a clean cloth to remove any dust from the filing and buffing process.
Techniques for Lifting and Cutting Cuticles
Cuticle maintenance is crucial for a pristine acrylic application:
- Softening Cuticles: Apply a cuticle remover or oil to soften them. Let it sit for a few minutes.
- Lifting Cuticles: Using a cuticle pusher, gently lift the cuticle off the nail plate. Ensure you’re lifting only the dead cuticle skin.
- Trimming Cuticles: If necessary, trim the lifted cuticles with a sterilized cuticle clipper. Be precise and cautious to avoid cutting live skin.
Importance of Maintaining Healthy Cuticles
Healthy cuticles lead to healthier nails:
- Protection: Cuticles protect your nails from infections.
- Nail Growth: Well-maintained cuticles promote healthy nail growth.
- Aesthetics: Healthy cuticles enhance the overall appearance of your acrylic nails.
Essential Tools for Cuticle Care
| Tool | Purpose |
|---|---|
| Cuticle Remover | Softens and helps remove dead cuticle skin |
| Cuticle Pusher | Gently pushes back cuticles |
| Buffer Block | Smoothens the nail surface |
| Nail File | Shapes the natural nails |
| Sanitizer | Cleanses hands and nails |
As a nail expert, I emphasize the importance of these steps not just for aesthetic purposes but also for the health and integrity of your nails. Proper preparation ensures that your acrylic nails will look fabulous and last longer. Remember, taking care of your cuticles is not just about beauty, it’s about nail health.
Nail Plate Buffing and Shaping
As an experienced nail expert, I recommend a meticulous approach to preparing your natural nails for acrylic application. Start by ensuring your nails are free from oils – a critical step for the longevity of your acrylic nails.
- Cleaning: Begin by washing your hands with a mild soap. Dry thoroughly.
- Dehydrating the Nail Plate: Apply a nail dehydrator to each nail. This step is crucial for removing any residual oils and moisture.
- Choosing the Right File: Opt for a 180-240 grit nail file. This grit range is ideal for natural nails, offering enough abrasiveness without being too harsh.
Tips for Using a 180-240 Grit File for Shaping
Shaping your nails correctly sets the foundation for stunning acrylics:
- Gentle Filing: File gently in one direction to avoid splitting the nail.
- Nail Shape: Decide on your desired nail shape – whether it’s oval, square, almond, or another style.
- Consistency: Ensure all nails are shaped uniformly for a cohesive look.
Techniques for Buffing the Nail Surface
Buffing is essential for a smooth acrylic application:
- Selecting a Buffer: Use a buffer block with a fine grit to avoid damaging the natural nail.
- Even Buffing: Buff the entire nail surface in gentle, even strokes.
- Dust Removal: After buffing, brush off the filing dust from your nails.
Nail Shaping and Buffing Guide
| Step | Tool Used | Purpose |
|---|---|---|
| Cleaning | Mild Soap | Removes dirt and prepares for dehydrating |
| Dehydrating | Nail Dehydrator | Eliminates oils and moisture |
| Filing | 180-240 Grit Nail File | Shapes the nails and smoothes edges |
| Buffing | Buffer Block | Creates a smooth surface for acrylic adhesion |
| Dust Removal | Soft Nail Brush | Clears nail surface of any debris |
For perfect acrylic nails, remember, preparation is key. The time you invest in properly buffing and shaping your natural nails will be evident in the flawless finish of your acrylics. Each step, from removing oils to evenly buffing, contributes to the longevity and beauty of your nail art.
For further insights on achieving perfectly dried acrylic nails, explore UV Lamp Duration to Dry Acrylic Nails.
Advanced Preparation Techniques for Different Nail Types
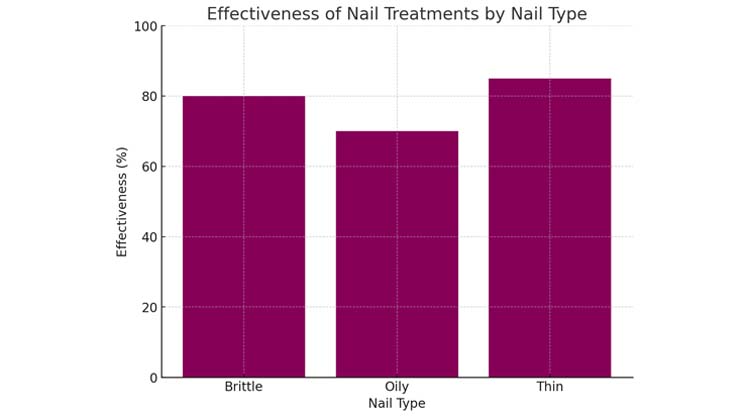
As a nail connoisseur, you understand that each client’s nails are unique, demanding customized prep techniques for the best acrylic application.
- For Brittle Nails:
- Strengthening Treatment: Use a nail strengthener or keratin treatment before applying acrylics. This enhances the nail’s resilience.
- Gentle Preparation: Avoid excessive filing; use a soft buffer block to prevent further weakening of the nail.
- For Oily Nails:
- Thorough Dehydration: Use a nail dehydrator generously to ensure removal of all oils.
- Primer Choice: An acid primer can provide better adhesion for acrylics on oily nails.
- For Thin Nails:
- Protective Layers: Apply a base coat or a nail hardener to create a protective layer.
- Lower File Grit: Use a higher grit number (finer file) to prevent damage during shaping.
Tips for Dealing with Common Nail Issues
- Regular Maintenance: Encourage clients to maintain nail health between visits.
- Nutritional Advice: A diet rich in biotin and other nail-friendly nutrients can significantly improve nail quality.
- Gentle Products: Recommend gentle, acetone-free removers and nourishing cuticle oils.
Custom Nail Preparation Techniques
| Nail Type | Technique | Benefit |
|---|---|---|
| Brittle | Strengthening Treatment | Increases nail resilience |
| Oily | Extended Dehydration | Ensures better primer adhesion |
| Thin | Protective Base Layers | Adds strength, prevents breakage |
In your pursuit of nail perfection, remember that the best outcomes arise from recognizing and addressing the unique characteristics of each nail type. A tailored approach not only enhances the acrylic application but also contributes to the overall health and beauty of the nails.
For more insights on the lifespan of acrylic nails, consider exploring Duration of Acrylic Nails.
Acrylic Application Basics for Beginners
As a nail expert, it’s essential to guide beginners through the fundamental steps of acrylic nail application:
- Choosing the Right Acrylic System: Select between a traditional liquid and powder system or a newer gel system. Each has its own application technique and curing method.
- Applying the Acrylic: Carefully place the acrylic mixture onto the nail, starting from the cuticle area and spreading towards the tip. Ensure even distribution for a smooth finish.
- Shaping and Refining: Once the acrylic has set, shape the nails using a file and refine the surface with a buffer block. Aim for a natural and sleek appearance.
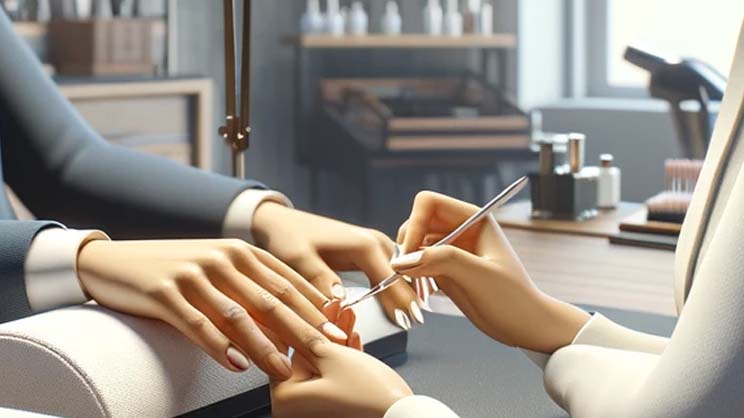
Importance of Cuticle Care and Nail Bed Preparation
Proper preparation is the key to flawless acrylic adhesion:
- Cuticle Care: Use cuticle oil and a cuticle pusher to gently prepare the cuticle area. This prevents lifting and ensures a neat application.
- Nail Bed Preparation: Buff the nail bed lightly to create a slightly rough surface. This helps the acrylic to adhere better.
Basic Steps for Acrylic Nail Application
| Step | Tool/Product Used | Purpose |
|---|---|---|
| Cuticle Preparation | Cuticle Oil, Cuticle Pusher | Prepares the cuticle for acrylic application |
| Nail Bed Prep | Buffer Block | Creates a rough surface for better adhesion |
| Acrylic Application | Acrylic Mixture, Nail Brush | Applies acrylic evenly across the nail |
| Shaping | Nail File | Gives shape to the acrylic nails |
| Refining | Buffer Block | Smoothens the acrylic surface |
Remember, precision in preparation and application lays the foundation for durable, elegant acrylic nails. By mastering these basics, beginners can achieve professional-looking results.
For further understanding of the ideal thickness for acrylic nails, visit Acrylic Nails Thickness.
Aftercare and Maintenance of Acrylic Nails
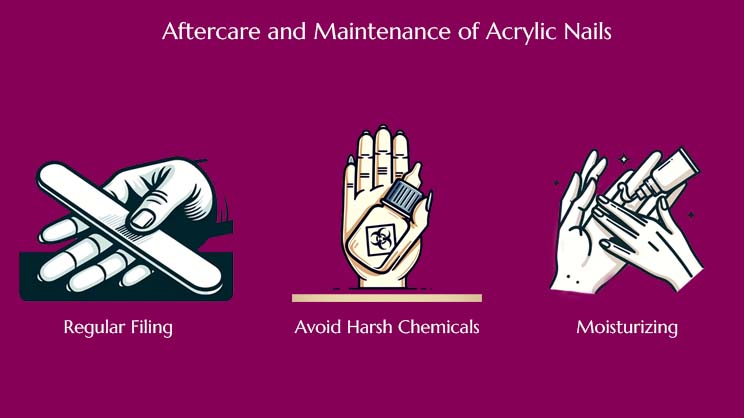
As a nail expert, I advocate for meticulous aftercare to ensure your acrylic nails remain stunning and durable:
- Regular Filing: File your nails every two weeks to maintain shape and manage any irregularities.
- Avoid Harsh Chemicals: When cleaning or washing dishes, wear gloves to protect your acrylics from harsh chemicals.
- Moisturizing: Regularly moisturize your hands and cuticles. Dryness can lead to lifting or damage to your acrylics.
Recommended Practices for Cuticle Oil Application
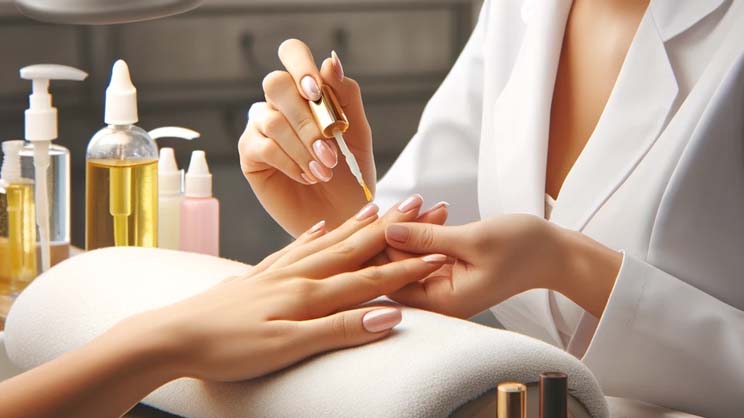
Cuticle oil is not just a luxury—it’s a necessity for acrylic nail health:
- Daily Application: Apply cuticle oil at least once a day. This keeps your cuticles and nails hydrated, which is vital for maintaining the flexibility and integrity of your acrylics.
- Gentle Massage: Gently massage the oil into your cuticles and the skin around your nails. This boosts circulation and promotes healthier nail growth.
- Choosing the Right Oil: Opt for nourishing oils like jojoba or almond oil, which are excellent for keeping the cuticle area hydrated and supple.
Acrylic Nail Aftercare Routine
| Care Aspect | Recommended Practice | Purpose |
|---|---|---|
| Regular Filing | Bi-weekly filing | Keeps nails in shape and checks for lifting |
| Chemical Protection | Wear gloves during chores | Protects acrylics from harsh substances |
| Moisturizing | Daily hand and cuticle moisturizing | Prevents dryness and promotes nail health |
| Cuticle Oil Use | Daily application, gentle massage | Keeps cuticles healthy, supports nail growth |
By following these aftercare tips, you can enjoy your acrylic nails for longer, ensuring they look as fabulous as the day they were applied. Remember, good nail care doesn’t stop at the salon—it’s an ongoing commitment to keep your nails looking their best.
Troubleshooting Common Issues with Acrylic Nails
As a nail expert, you’ll often encounter common issues like lifting or acrylic nails coming off prematurely. Here’s how to address these challenges:
- Preventing Lifting:
- Proper Preparation: Ensure thorough nail preparation, including dehydrating and removing any oils.
- Correct Application: Apply acrylic close to the cuticle, but not touching it, to avoid lifting.
- Regular Maintenance: Advise clients to come in for regular fills to prevent lifting due to nail growth.
- Addressing Premature Falling Off:
- Strong Adhesion: Use a high-quality primer and adhesive to ensure a strong bond.
- Avoid Water Exposure: Instruct clients to minimize prolonged water exposure, which can weaken acrylics.
Tips for Safe Removal of Acrylic Nails
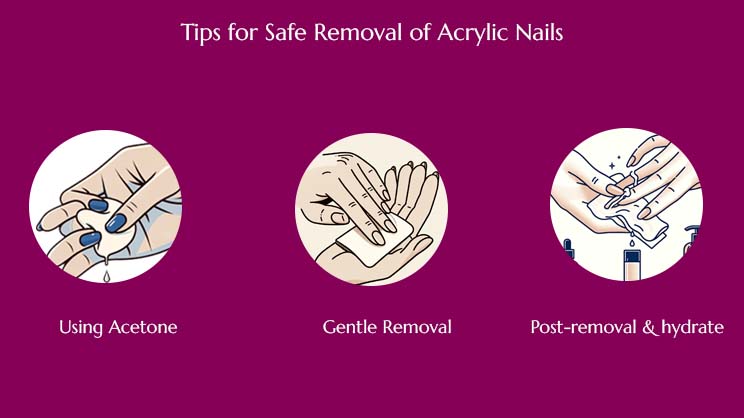
Safe removal is crucial to maintain the health of natural nails:
- Using Acetone: Soak cotton pads in acetone and place them over the nails, wrapping each finger in foil. Allow time for the acrylic to dissolve.
- Gentle Removal: Once the acrylic has softened, gently push it off with a cuticle pusher. Never force or pull the acrylic off.
- Aftercare: Post-removal, hydrate the nails with cuticle oil and a moisturizing lotion.
Acrylic Nail Troubleshooting Guide
| Issue | Solution | Tips |
|---|---|---|
| Lifting | Proper Nail Prep | Dehydrate, avoid cuticle contact |
| Falling Off | Strong Adhesion Methods | Use quality primer, limit water exposure |
| Safe Removal | Acetone Soak Method | Gentle pushing, avoid pulling |
| Aftercare | Hydration | Apply cuticle oil and moisturizer |
Remember, the key to resolving acrylic nail issues lies in meticulous application and client education. Guide your clients on proper care and maintenance to ensure their acrylic nails stay beautiful and intact.
Explore more about acrylic nail care in a salon setting at Manicure with Acrylic Nails.
Conclusion
I trust this guide on preparing nails for acrylic application has been insightful for you.
Now, I’d love to hear from you:
Which part of the nail prep process do you find most crucial?
Do you have any unique tips or experiences to share?
Your input is invaluable in enriching our understanding of nail care.
Feel free to share your thoughts in the comments. Let’s continue to learn and evolve in our nail care practices together!
